Flickr Blog
Just wanted to post a link to the Flickr blog I set up for our Vegas pictures. Check it out sometime! We'll be updating it constantly.
FLIP Flickr Blog
posted by Carleton - Director @ 7:55 PM
0 comments
![]()
This web-log will serve as an ongoing commentary on the trials and tribulations faced by a young filmmaker as he tries to complete a short film.
posted by Carleton - Director @ 7:55 PM
0 comments
![]()
posted by Carleton - Director @ 6:30 AM
2 comments
![]()
posted by Carleton - Director @ 12:43 AM
0 comments
![]()
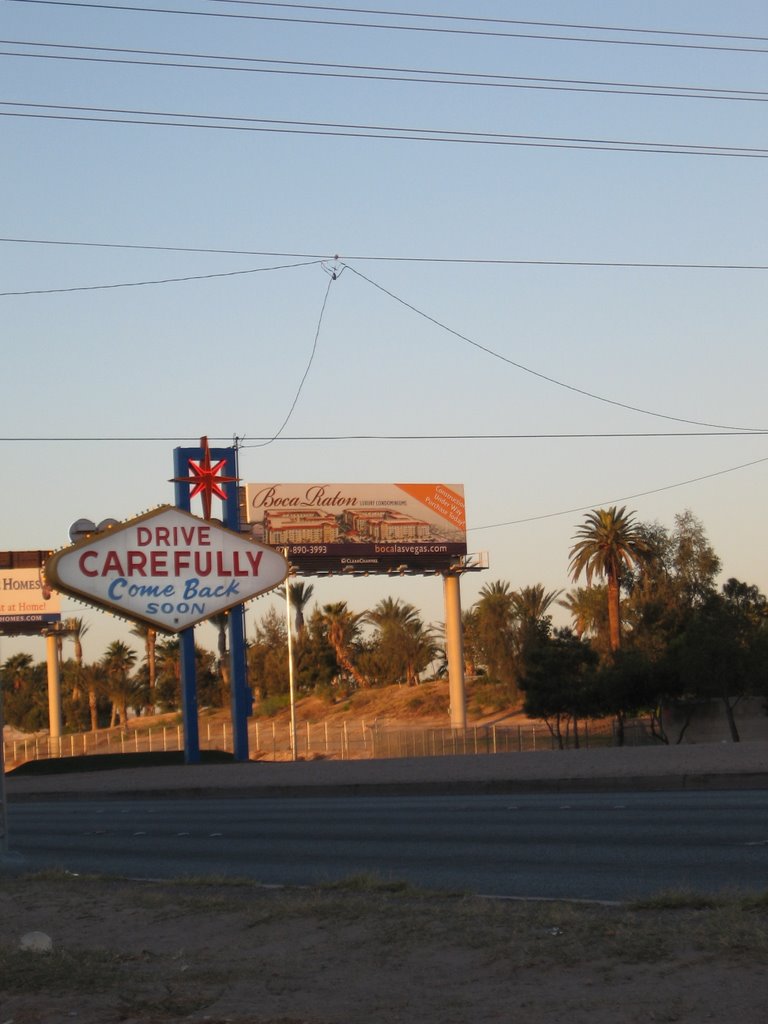
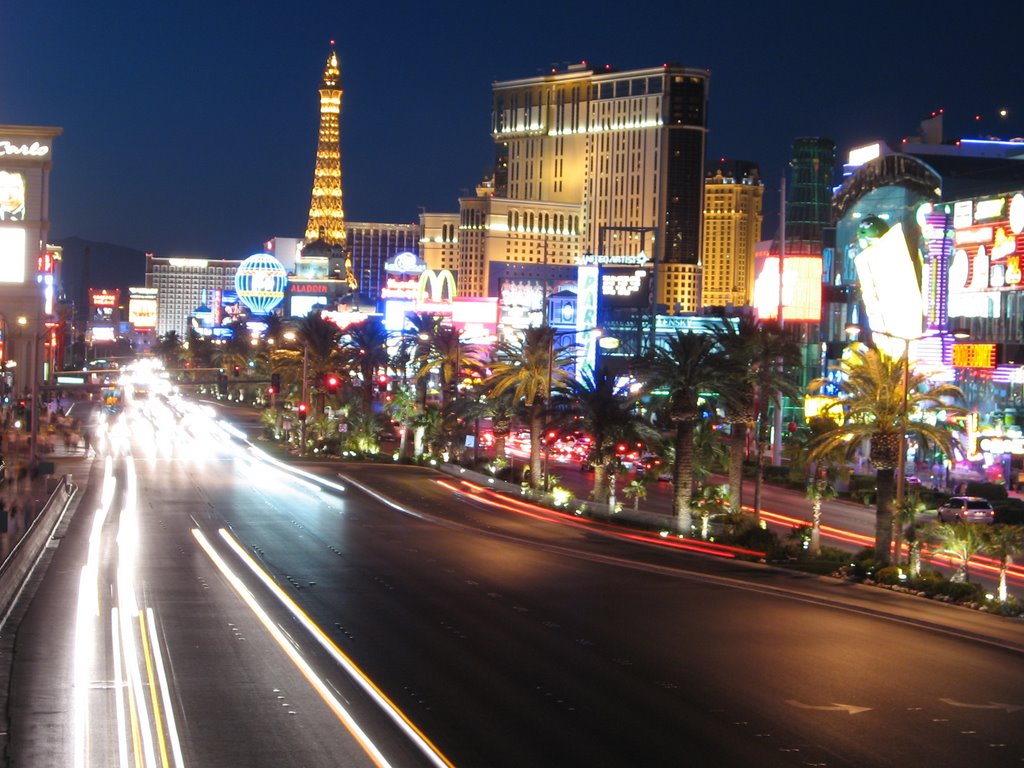 The beautiful Las Vegas strip at 9:00 PM. (Click to enlarge)
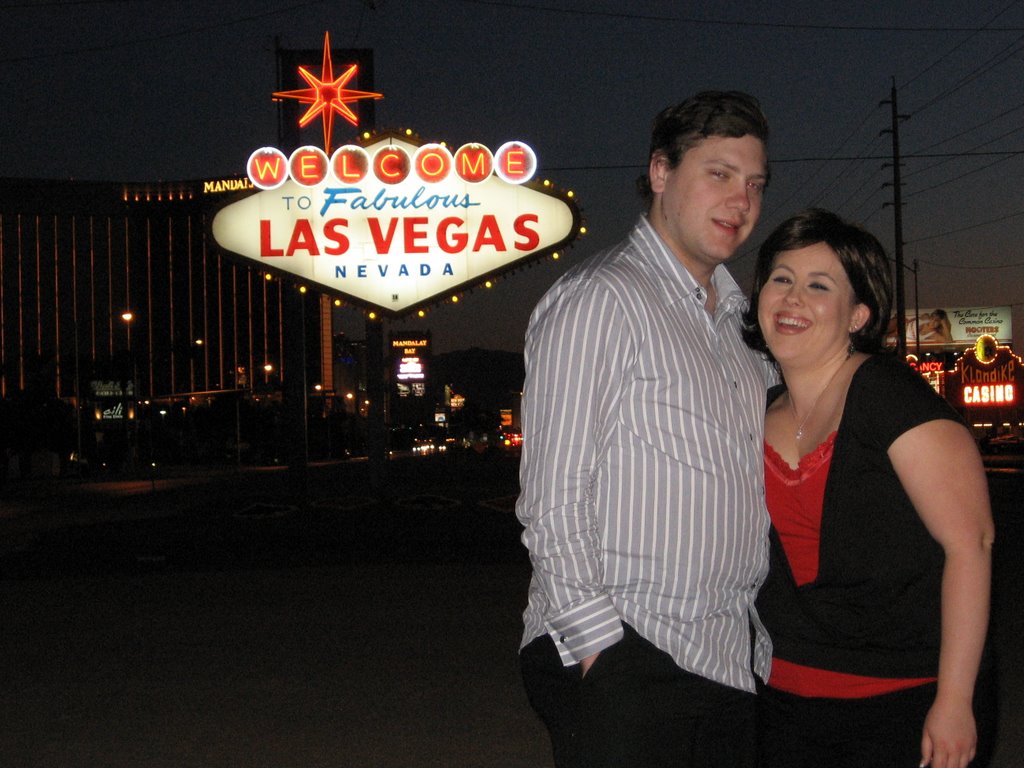
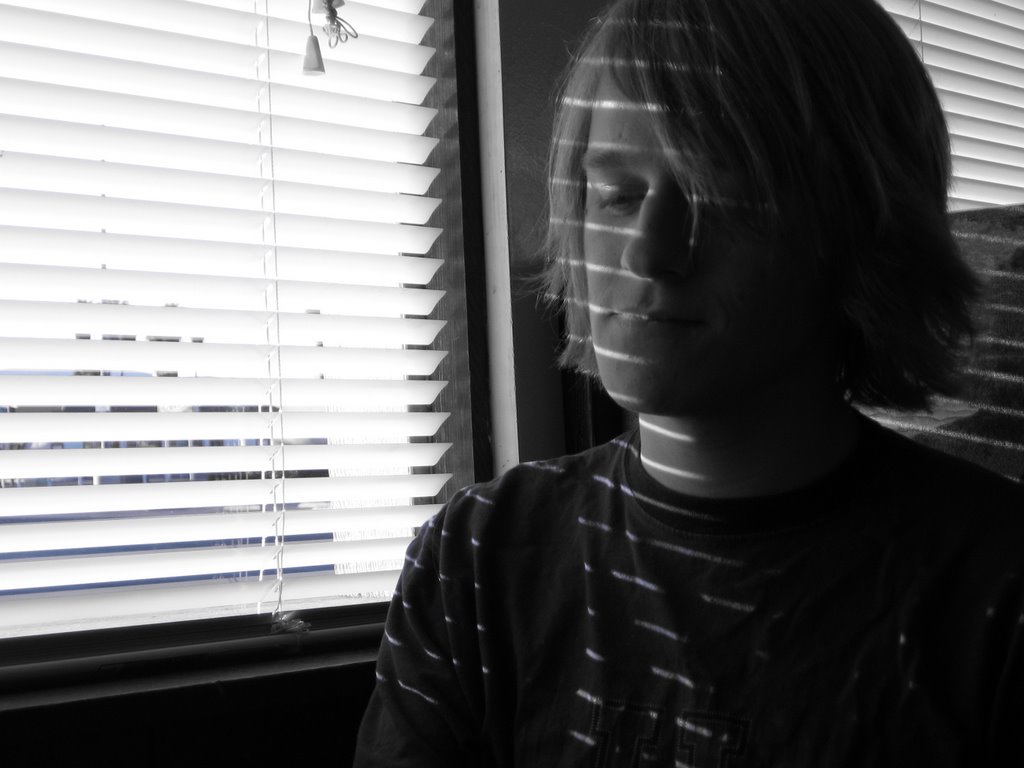 After that, we filled up at Acro for an incredible $3.19! (How depressing is it to get excited over a $3.19 gas price?) Since there was NO traffic going into Vegas, we arrived in Vegas about 3 hours too early (Noon), so we went to the Grand Canyon Experience, Gameworks and The M&M's store (which is super lame). After we had killed enough time, we mosied on over to the hotel and checked in. I decided we would be as inconspicuous as possible if we had the bell-hop bring our various bags up, rather than everyone taking a single item (which would take forever). So, $40 in tip money later, all the bags were
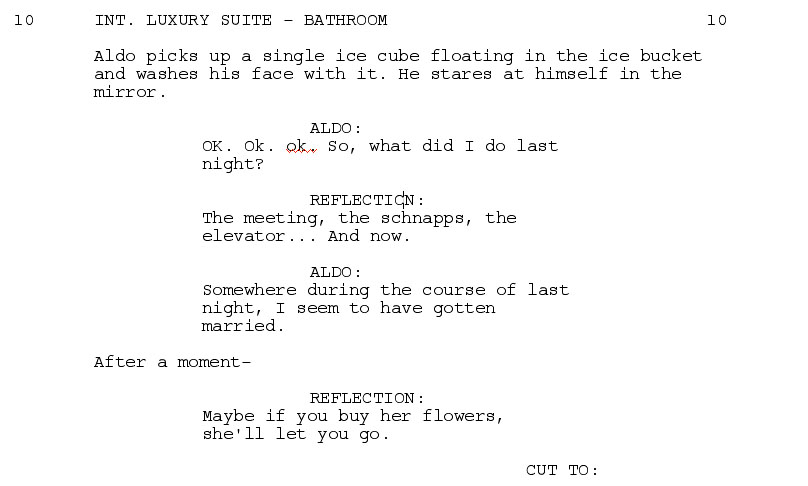
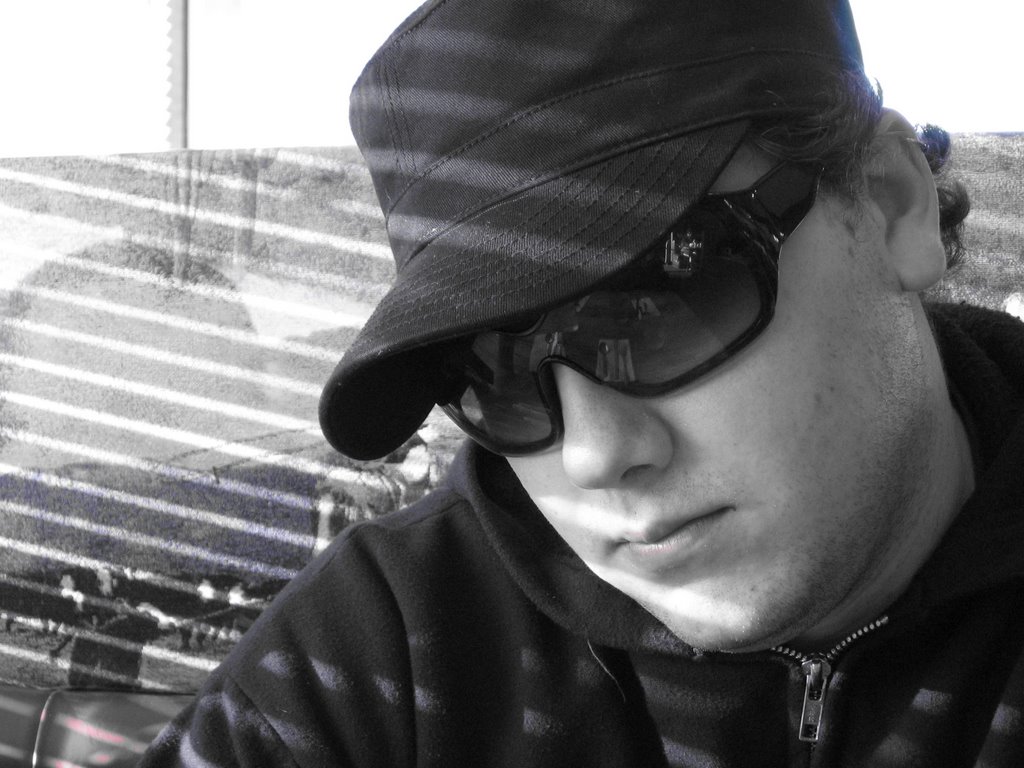 up in the room. An hour or so later, we started setting up for the scene in the bathroom where Aldo talks to himself in the mirror.
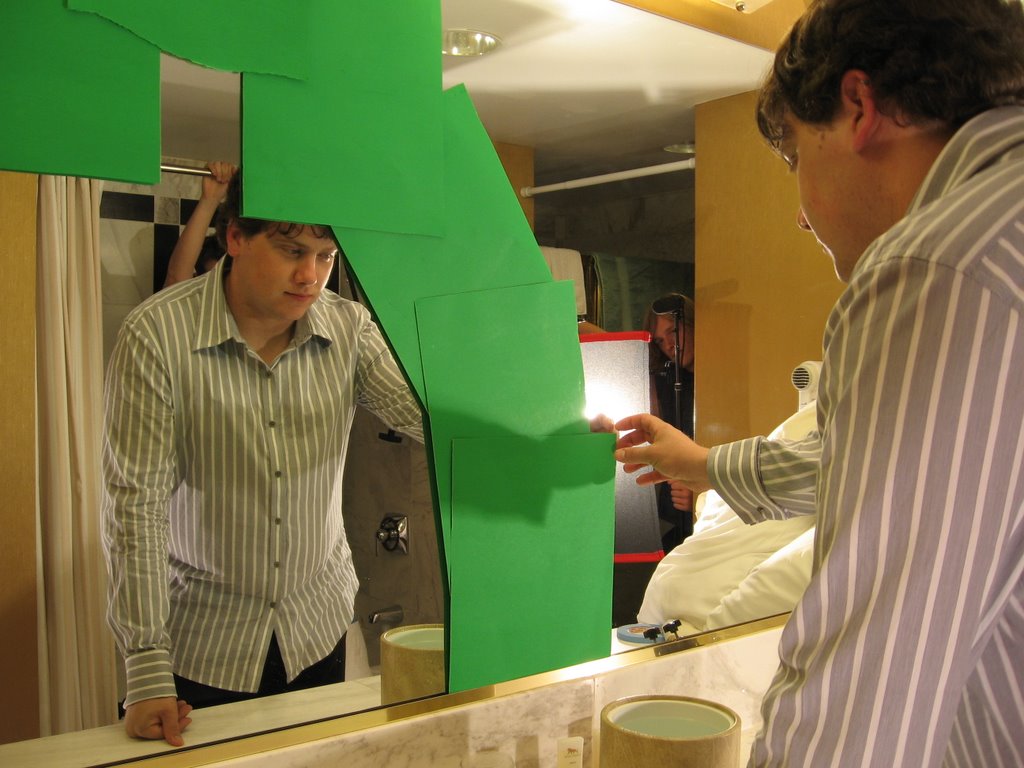

posted by Carleton - Director @ 12:32 PM
0 comments
![]()
In about 7 hours, Myself, Rebecca, Jarrod and Geoff will all be on our way to Las Vegas . We are eating breakfast at 7:00 am, it should take about an hour. And then we'll be back on the road again at 8:00 am. With a stop in Barstow for gas and various foodstuffs, we should arrive at the hotel right at 3:00 pm (check-in time). We have two scenes to shoot when we get there. The first scene is the bathroom scene with Jarrod talking to himself. The other scene is a scene where Jennifer and Aldo are playing cards and decide to go outside to walk around. That will be another crane/dolly shot, so I've budgeted extra set-up time for that. If everything goes according to schedule, we will be done shooting by 1:00 am. I'll post an update as soon as I get an internet connection again. Bye guys!
posted by Carleton - Director @ 11:41 PM
0 comments
![]()
Well, everybody's doing it, so I think I'll make a post as well.
posted by Rebecca - Producer @ 12:23 AM
0 comments
![]()
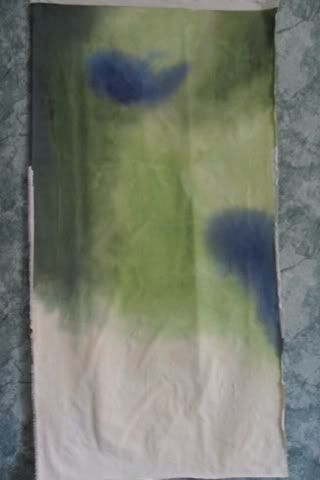
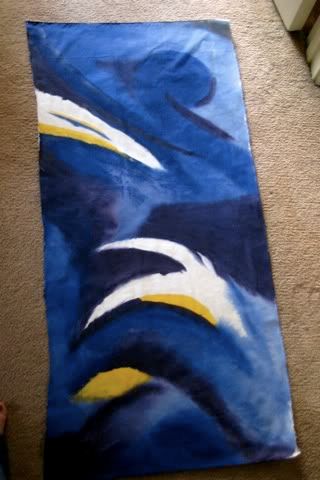
Today everybody involved in the movie (except for Matt Jarbo, who has a job which precludes him from all fun activities) met at my house. We had some burgers then we set up for a photo opp. Originally, the script called for Aldo to see the bubbles, the marriage certificate and Jennifer before he realized what happened the previous night. Rebecca had the idea of showing a wedding photo instead of the bubbles. I liked it, but told her the only way I would do it was if we got an old 1970's style Polaroid camera and shot the picture on 669 film. 669 film is different from what people normally think of when they think of Polaroid. Rather than the square, low res pictures that come out of modern polaroids, 669 film produces pictures that look almost like 35mm snap shots. After finding a camera that works (to a degree), we got some props for the picture. Rebecca wanted a cheesy veil to wear and I wanted balloons. We got both. I set up the shot on an empty wall in my house. Altogether, I shot 7 polaroids of Jarrod and Rebecca in costume. I have one that I really like. I also shot some digitals, for backup.
posted by Carleton - Director @ 11:14 AM
0 comments
![]()
How many of the moviemakers out there have been in this situation? You pack everything into the car, arrive on location, pull out the camera and tripod- then you realize that you left the tripod adapter plate at home. I've had it happen to me twice, which is the main reason that I have taken to creating equipment checklists.
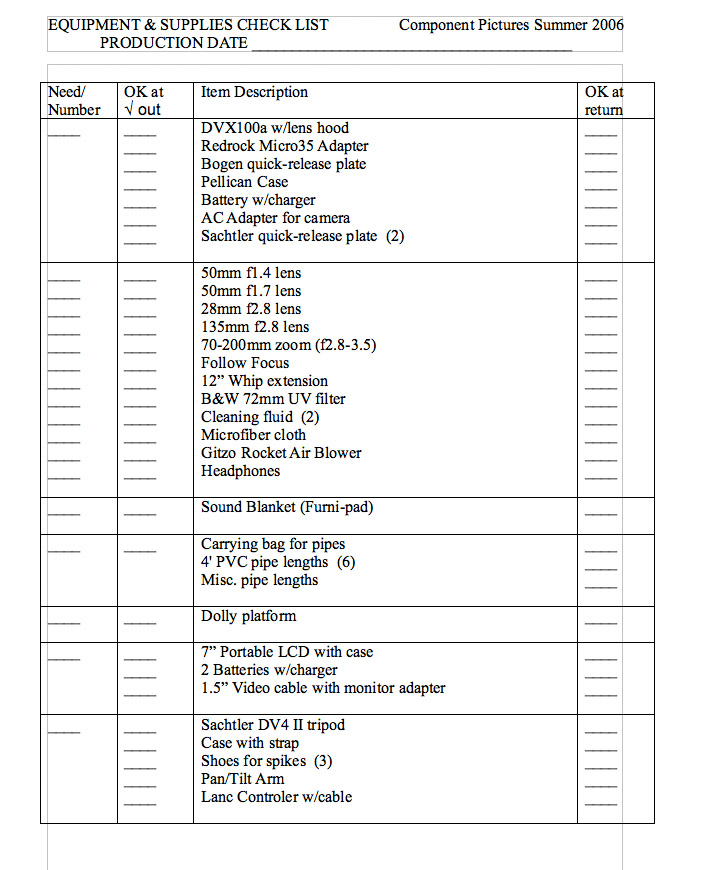 It should look something like above. (Click to enlarge)
posted by Carleton - Director @ 1:17 AM
0 comments
![]()
 (Click picture for larger image)
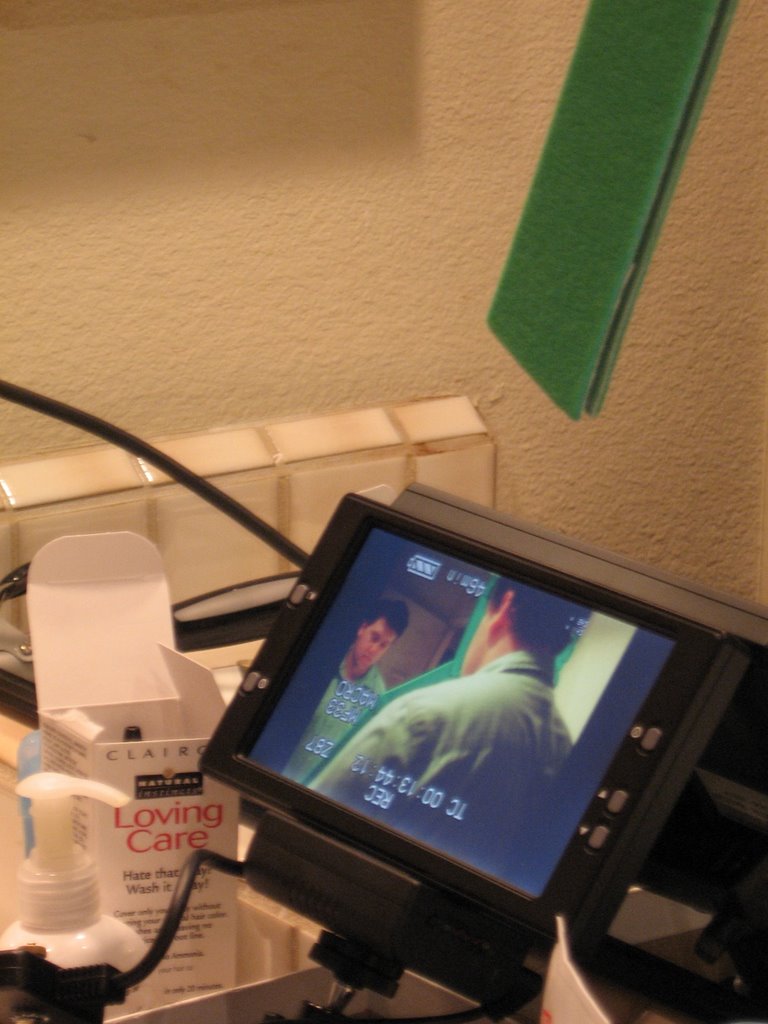 I want to tackle this effect via greenscreen. (If you are not familiar with greenscreen, visit this link .) As you can see from the photo, I outlined Jarrod's... well, his outline with green chromakey tape. I figured this would be the ideal way to do it for several reasons. Since only a small part of the mirror is covered, Jarrod will still be able to make believable eye contact with himself. Also, while I do have a greenscreen big enough to cover up the entire mirror, that would involve evenly lighting it. The bathroom is not really the ideal place to be running a bunch of hot lights, nor is there space to accommodate everything I will need. In addition, if I used a green screen, there would be a TON of green spill all around the mostly white bathroom (A huge giveaway as to how the effect was done.)
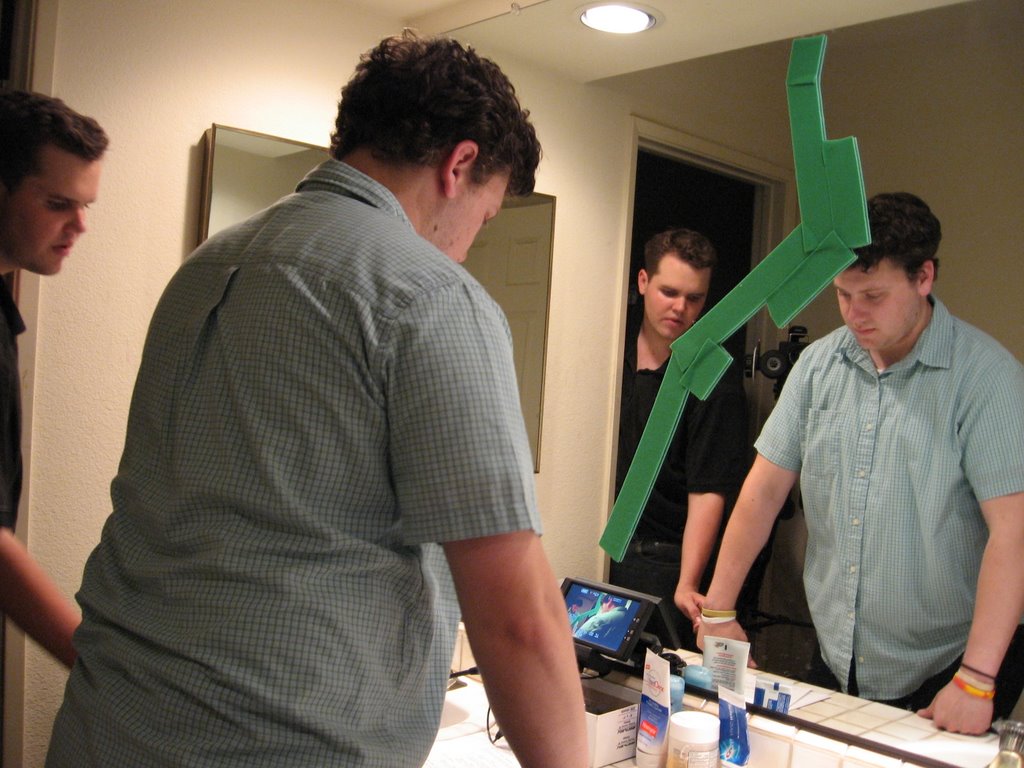 In post-production, I will go into the shot with the green tape and digitally paint the same color green over the rest of the mirror. Since the scene is locked down, this should be a relatively simple procedure (in Motion, or AE, or whatever). This will make the shot seem as if there had been a large greenscreen there the whole time. The benefit to this method is that I know it will be evenly lit since I will be painting it in myself.
posted by Carleton - Director @ 5:37 PM
2 comments
![]()
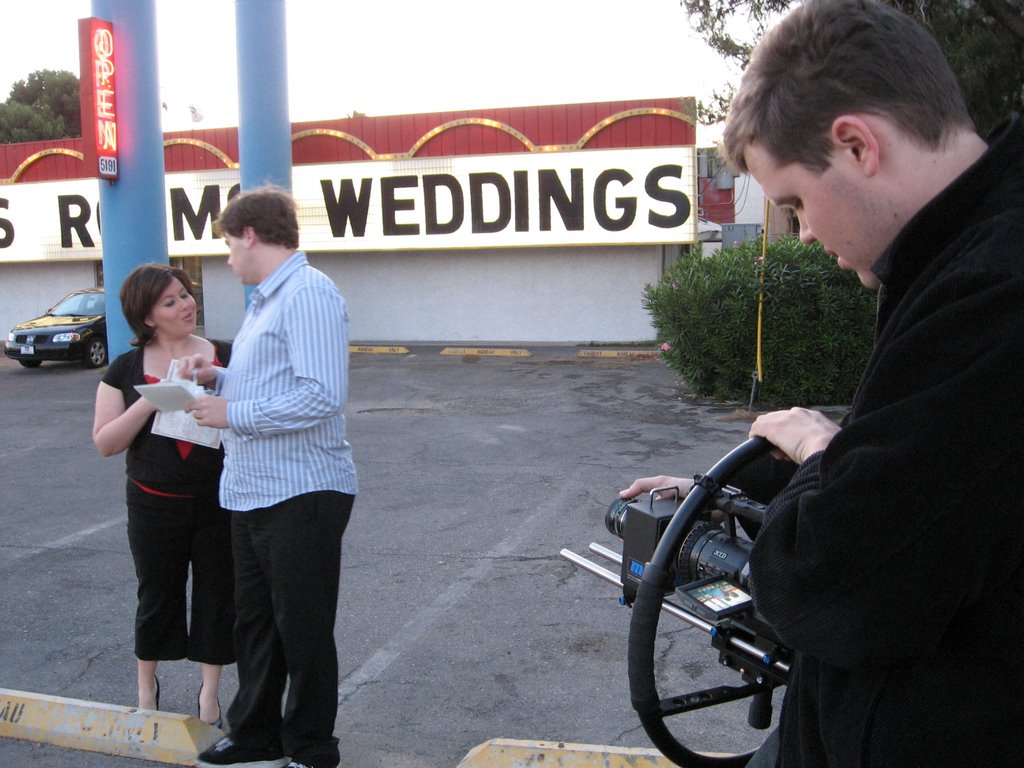
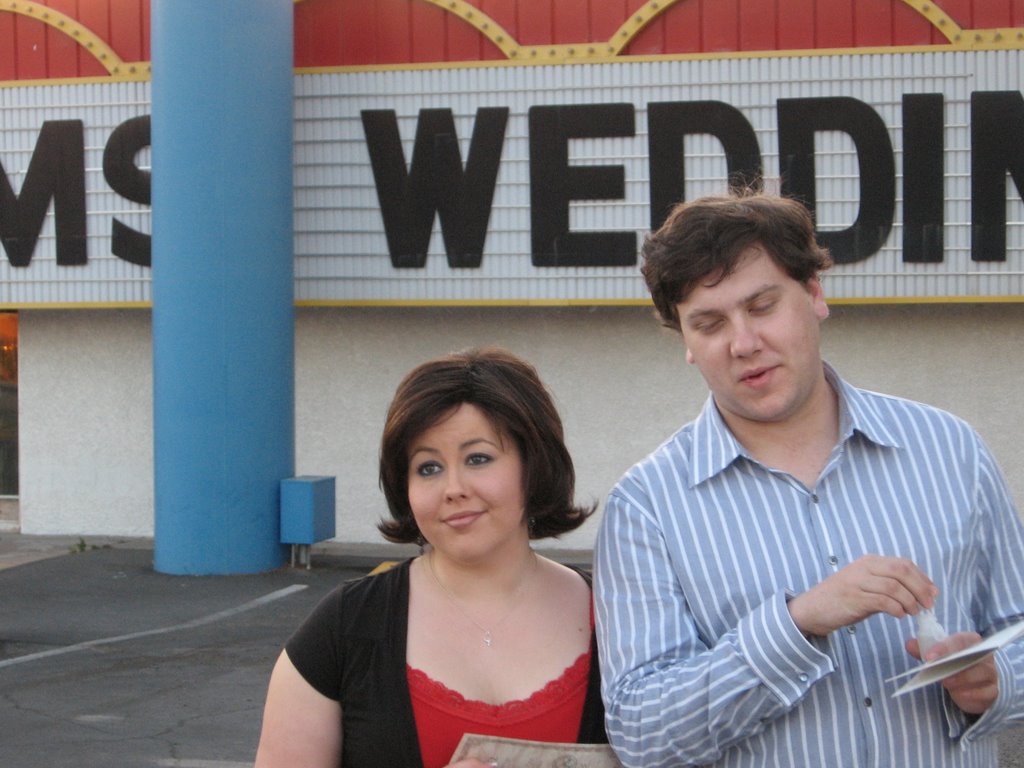
One of my many responsibilities as producer is to make sure we don't come across any copyright infringements. The rooms at our hotel have copyrighted artwork hanging in them, so we need to cover them up with original, non-copyrighted artwork.
posted by Rebecca - Producer @ 3:11 PM
0 comments
![]()
Tonight we had rehearsal for the movie. I want everything to go smoothly when actual on location in Vegas, so we are planning out camera moves now to see what might give us trouble later. When scouting the room in Vegas, I measured the dimensions and wrote them down in my handy-dandy notebook. When we started rehearsing back here in San Diego, I took some gaffer tape and taped out the layout of the room on the floor of my house. This way the actors can get a feel for the scale of the room, and develop a sense of spatial awareness.
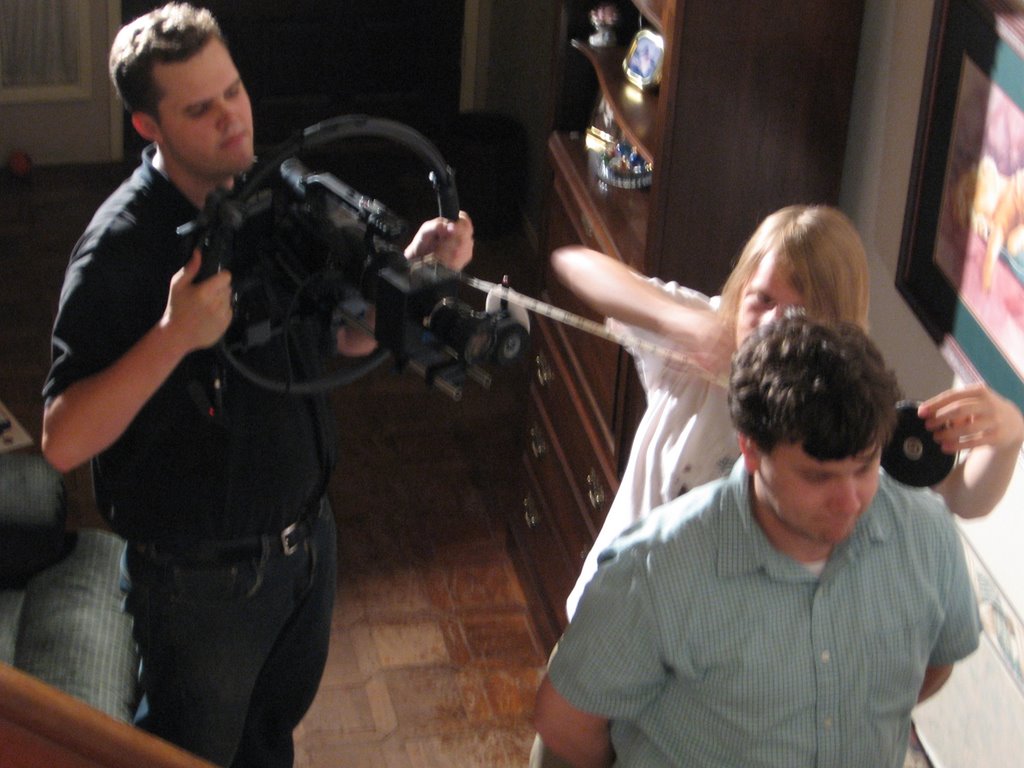 We are using the FigRig for this shot, with Geoff pulling focus via an 18" whip. What we did first run through it with the actors. I saw what their natural way of doing the scene was (where they stood, how they moved, ect.) then we re-created it and tweaked various aspects.
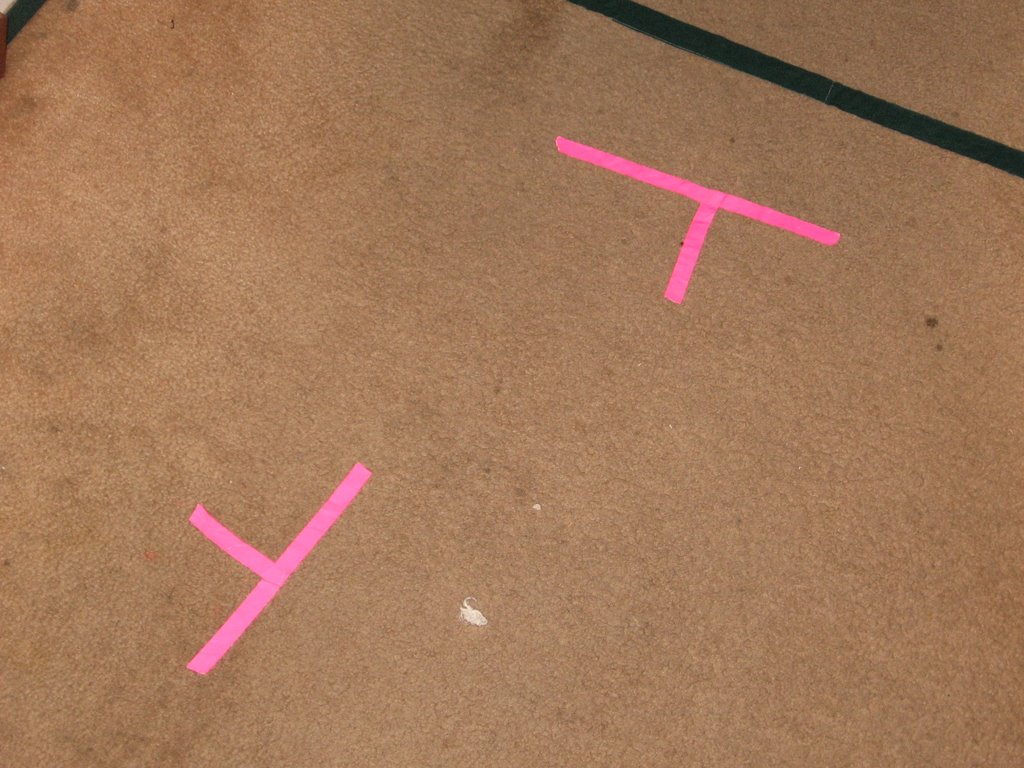 They must hit these marks with machine-like precision each time. Once the actors have their marks, the First AC (Geoff) will take a tape-measure and measure the distance from the focal point of the camera (a metal handle on the Micro35 adapter) to the actor. I was told once that it is always best to focus on the actor's eyes when measuring for focus. So I had Geoff measure to the actors eyes, or if they were not facing the camera, the very back of their head.
  Once he measures a distance, he turns the lens to the corresponding focus distance and makes a mark on the follow focus' wheel. I suggested he number them in the order he will pull the focus. Once we have done that for all the actors marks (there are 5 marks, which, in this case, gives us 5 focus pulls) we are ready to light the scene.
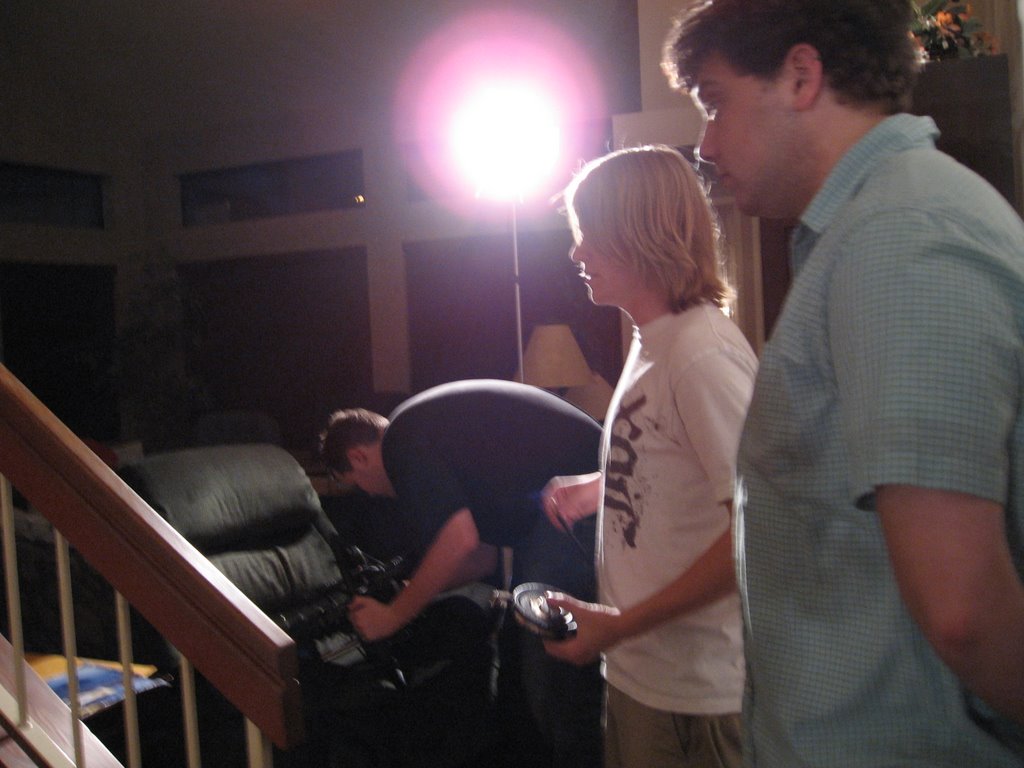 As the actors move through the shot, I follow behind them and when they hit their marks, Geoff pulls focus. For the sake of my forearms, I only want to do this scene a few times. (The entire rig weighs about 17 pounds, fully loaded) So after a few takes, I am confident we are ready to move on to the next scene.
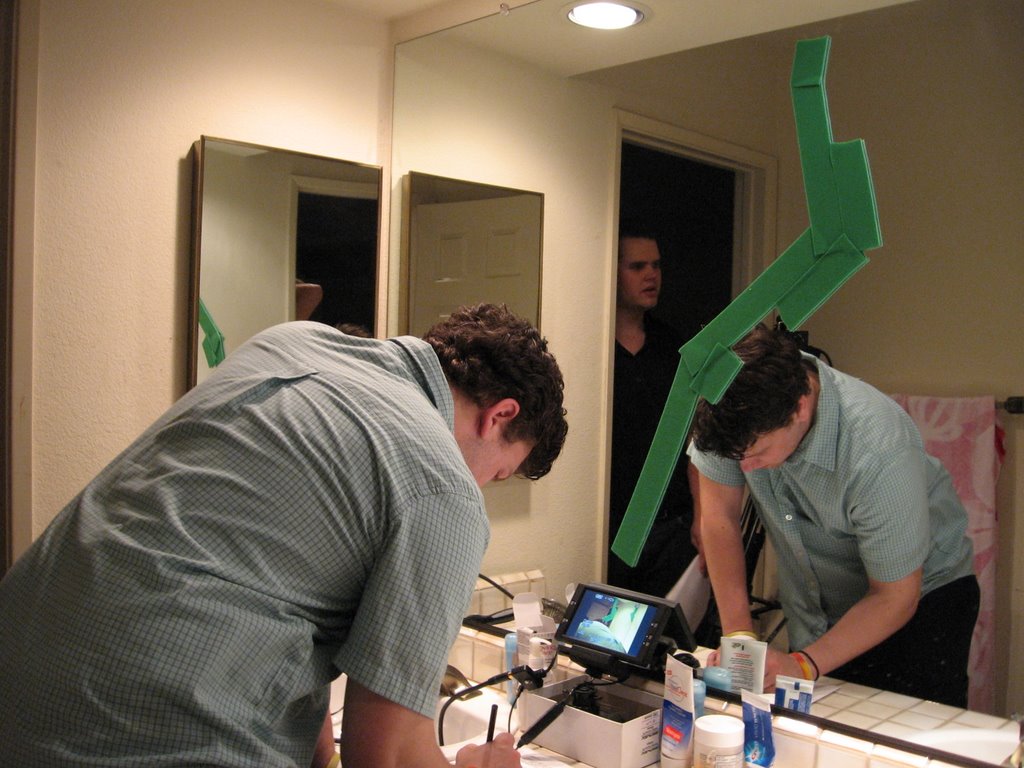
posted by Carleton - Director @ 11:50 PM
0 comments
![]()
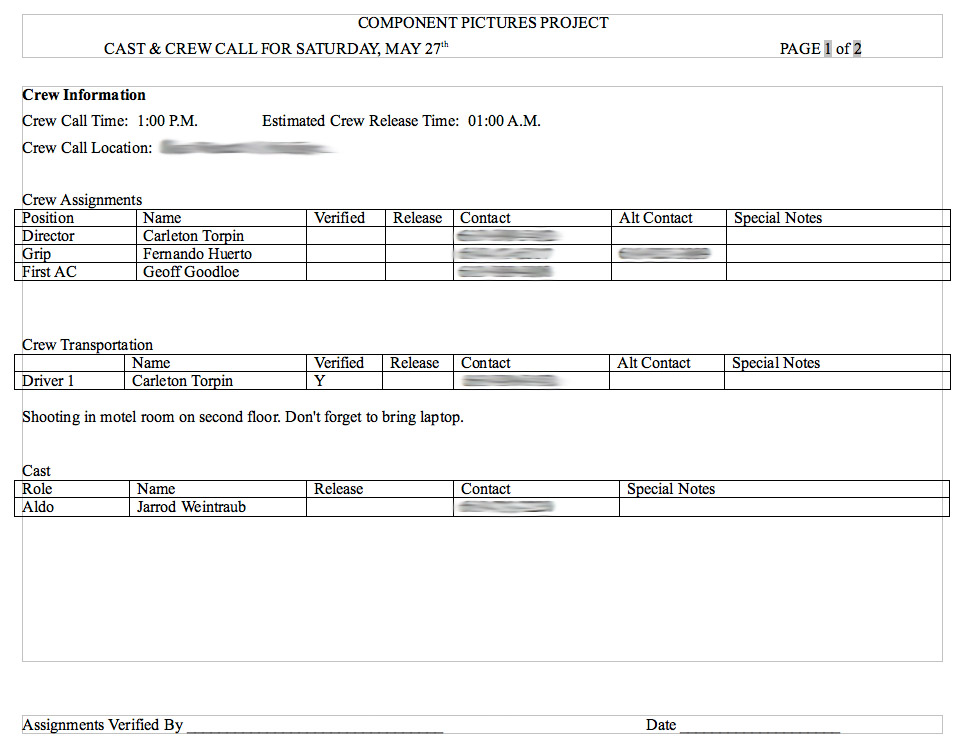
I just want to post our shooting schedule for everybody. This will outline the days we will be shooting. I will be posting at the end of every shoot day. These posts will go over what we were able to get shot that day and how we solved (or didn't solve) any problems that occurred.
posted by Carleton - Director @ 11:32 PM
0 comments
![]()
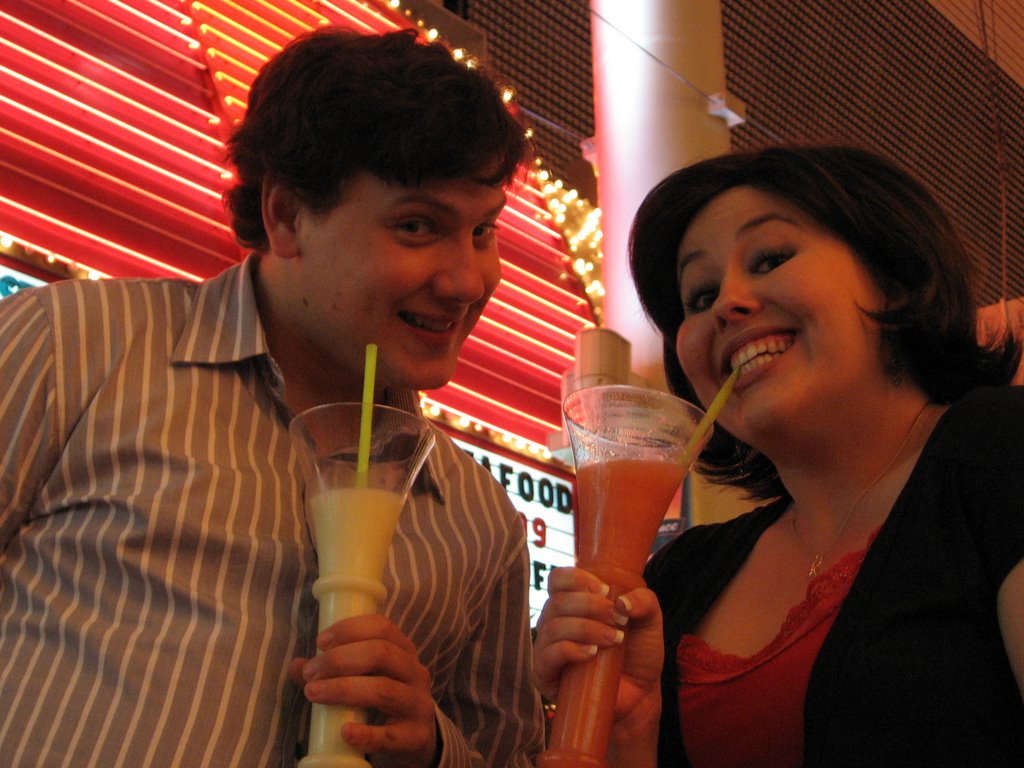
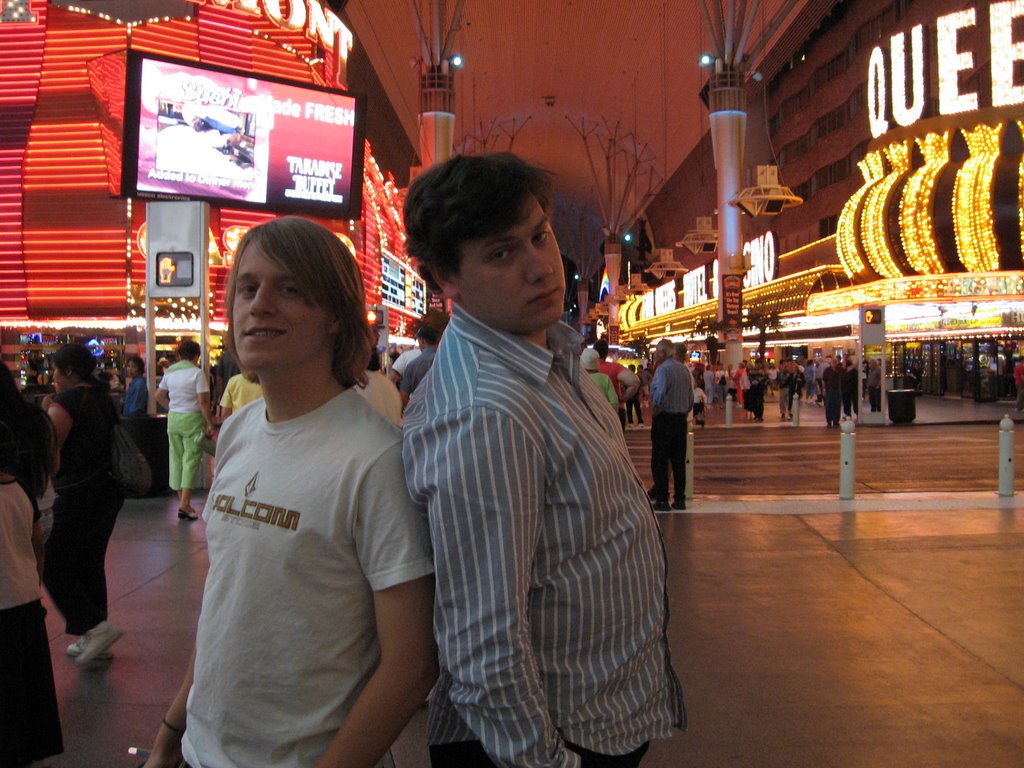
Jarrod is a fantastic actor, and we are absolutely thrilled to have him on this project, but back in November or so, when we first started thinking about casting, Jarrod wasn't someone who either of us knew that well. Seeing as how we're all sharing a room in Vegas for a week, we wanted to make sure that everyone knew everyone really well before going. We had first asked another actor to play the part of Aldo. He was someone who I had worked with previously and, like Jarrod, is predominantly a theatre actor. We had been in some classes together and were friends. We took him out to a business lunch to try and court him for the film. The following will be a few of the mistakes we made at our lunch and in the process of asking him to do the movie, plus, a few things that you might want to think about.
posted by Rebecca - Producer @ 11:19 AM
0 comments
![]()
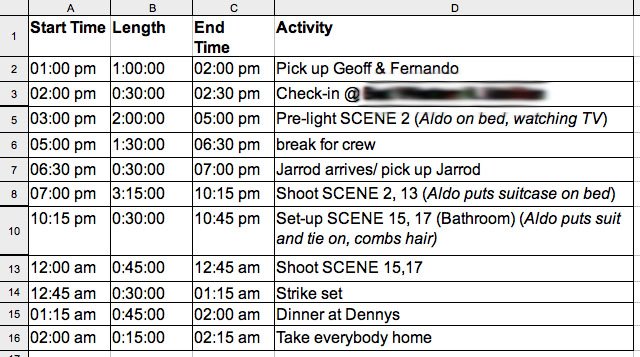
Planning is important when you want to make a movie. Sure, I've done movies that had almost no planning at all and they turned out well enough. But, when a producer is putting up money for a project, they want to see that you know what you are doing... and when you will be doing it. So I created a production schedule in Excel. (I was actually given the template for it by my Producer friend Barbara). It broke down like this:
posted by Carleton - Director @ 9:45 PM
0 comments
![]()
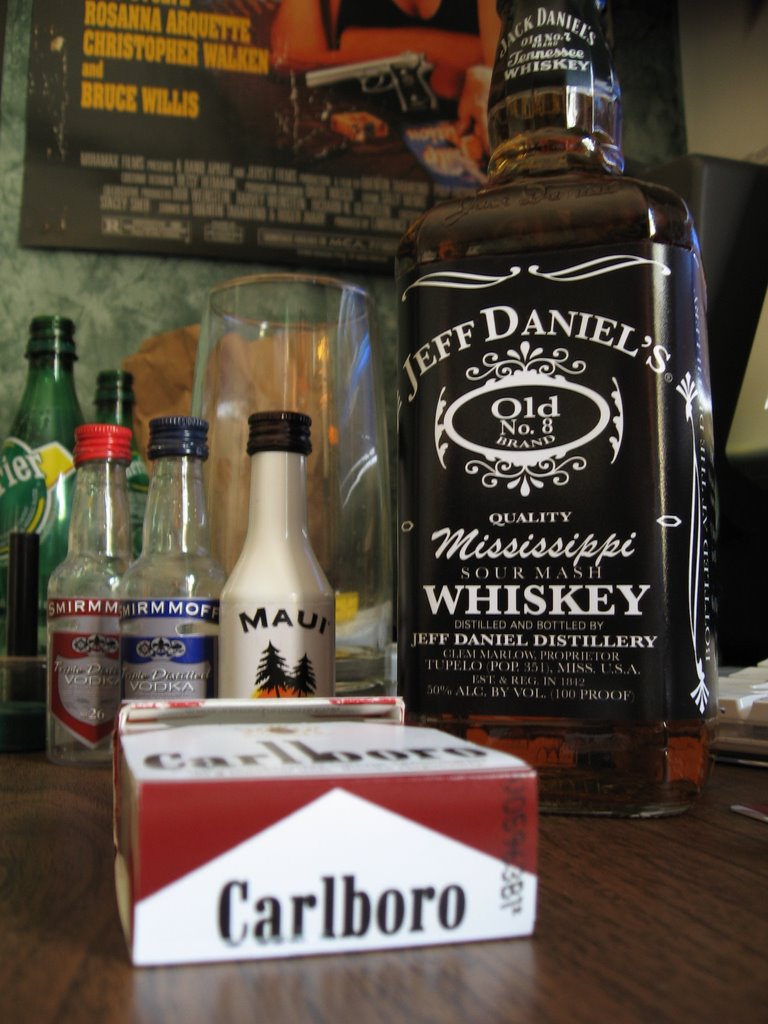 Since we don't have a colossal budget or any corporate sponsors for this film, I have taken it upon myself to do the production design for some key props. Since my goal is to submit this to various film festivals and eventuality self-distribute it on DVD, I need to be sure I don't have any unauthorized copyrights or trademarks in my movie. That means that any prop I had written into the story needs to have an Alter-Ego version (or Bizarro version, as I call them). With each of the following props, I have taken their existing logo/design and tweaked it to the point where it is no longer infringing on the existing look. Case in point: a bottle of Jack Daniel's Whiskey.
 As you can see, the bottle no-longer says "Jack Daniels". It is now, Jeff Daniels. A few other key differences are: Old Number 7 is now Number 8, Tennessee Sourmash is now Mississippi Sourmash and the general decoration around the label is different.
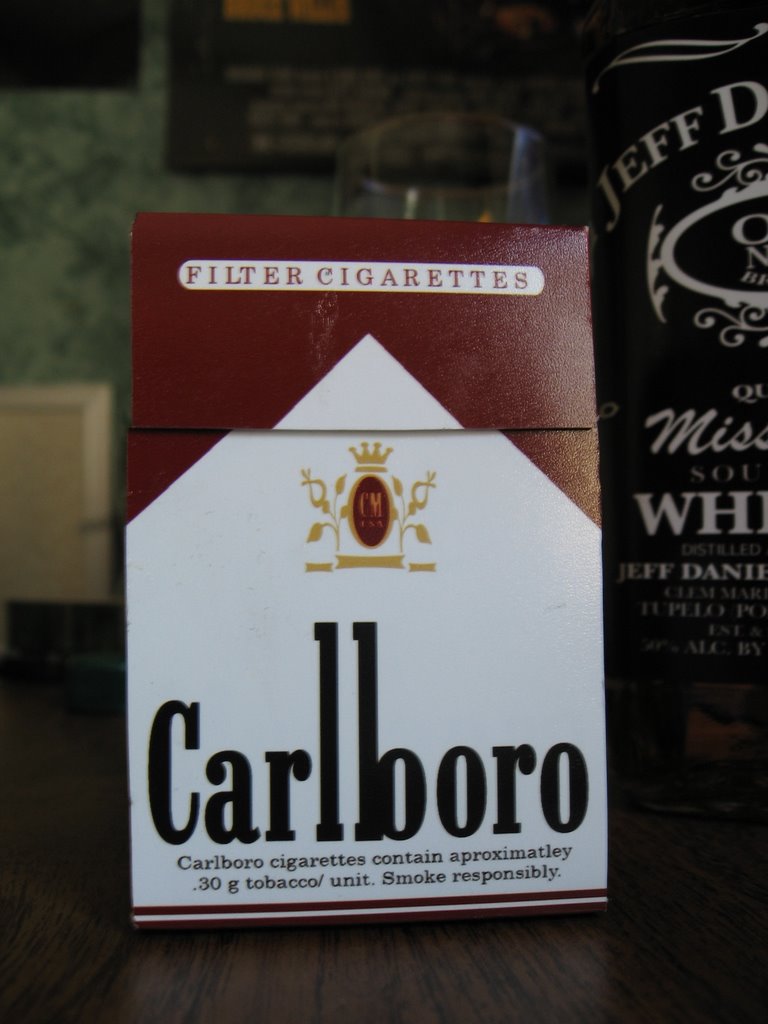 The next product is a box of cigarettes. I don't really want to promote smoking, but I felt it was necessary for the story to have the main character smoke. This prop was a little harder to make than the Jeff Daniels label. I had to first measure the width of the box of cigarettes, then I had to measure the length of the entire box. My end result was a Photoshop project about 9 inches long by 2 inches wide. (Image on right, feel free to use in your own production)
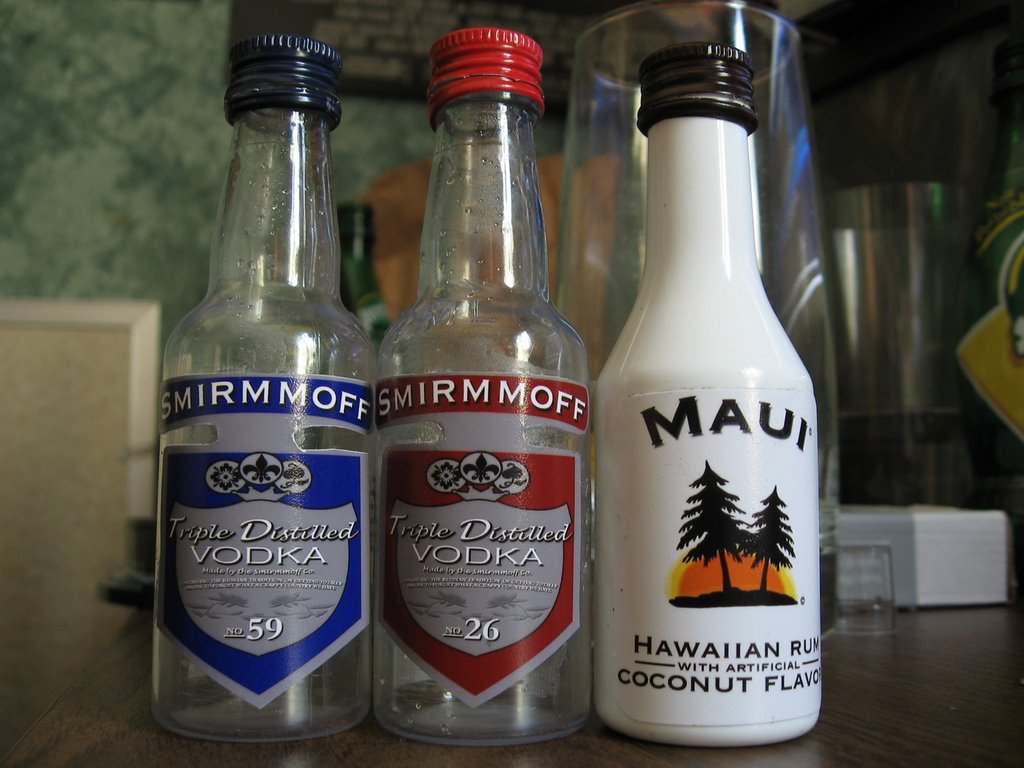 I know what you're thinking. "Is this movie just about characters getting loaded and smoking?", well, not really. But they do drink and smoke, as people in Vegas are apt to do. These are the little alcohol bottles typically found in mini-bars in hotel rooms. I had to make a few different kinds for the movie. The first 2 are just Smirnoff rip-offs. I followed roughly the same procedure of measuring and printing as before, but this time, I had to make 2 different kinds of labels. I made the blue one first, then I just did a color switch for the red one. (I also changed a number on it). The Maui Rum bottle was pretty easy as well. The trees are standard shapes in Photoshop and I just created an orange half-circle behind them. To that circle I added an "Outer Glow" effect and it looked just great. When I was done with all 3 of the labels, I put as many as possible onto an 8x10 sheet and printed them at the photolab. So, for the cost of 3 8x10 pictures at a photo lab, I got plenty of props that need absolutely no legal clearances! What a deal!
posted by Carleton - Director @ 4:16 PM
0 comments
![]()
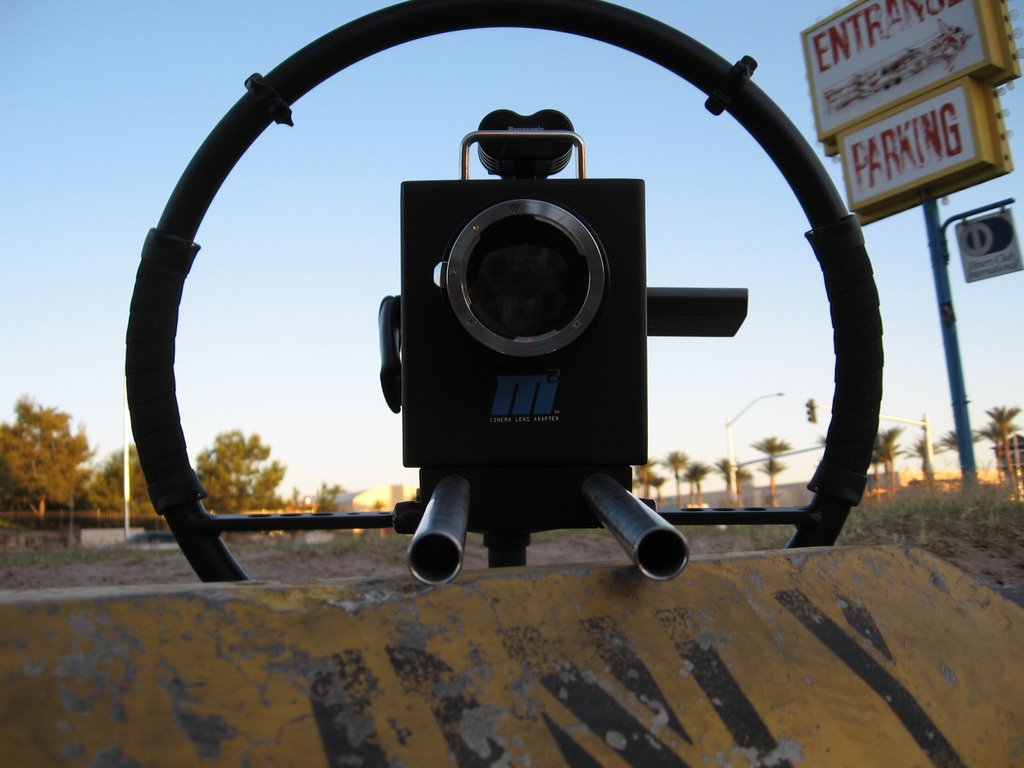
I am making this movie with a DVX100a which means I will be running 24P. In addition to this, the Micro35 adapter will give me the shallow DoP that 35MM film cameras get. So with this set-up, I am able to get a look that is very similar to film but with the low-cost of MiniDV video. My entire budget for this production is much, much lower than a comparable short movie being shot on Super16mm film. And since I own all this gear (instead of renting), I can theoretically make another movie for just the cost of tape and food for the cast & crew.

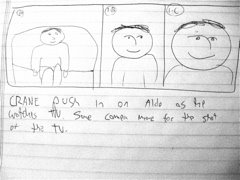 This shows the intense kind of acting needed for this scene. Actually, Aldo is supposed to be falling asleep, but my drawings made him look retarded. So he is smiling instead. The shot will end just as a phone RINGS and we cut to a new angle. Getting this shot right will be more complicated than it seems, because my First AC (Geoff) will be pulling focus for the whole shot. Since the auto-focus feature will be disengaged to use the Micro 35mm adapter, all the focusing must be done manually. This means that Geoff has to be turning the follow focus whip the whole duration of the shot. Considering that Geoff has yet to ever use a Follow Focus, this will take a few tries to get just right. But, once we get it, it'll be a great show. Certainly not one you expect to see in such a low budget film. There are other shots like this but, I'll leave them to a later post.
posted by Carleton - Director @ 7:49 PM
1 comments
![]()
We will be shooting in 2 cities for FLIP. Scene 2 with Aldo in his small hotel room will be shot in San Diego at a local hotel. I picked a local hotel because it will mean one less scene I have to shoot in Vegas. I scouted the hotel a few days ago, and it looks perfect (in a depressing, gross way). Also, I want there to be an obvious difference between Aldo's small, cramped room and Jennifer's larger suite. The other scene we are doing in San Diego is a scene at a prestigious downtown hotel. The very first scene of the movie takes place in a meeting room. Since we will be blowing out the windows (exposure wise I mean, no actual explosives are used in the production) you won't be able to tell it's not Las Vegas outside. Since there are several extras, this scene will be a bit of a hassle to coordinate, but I have it planned out with a little bit of time to spare.
posted by Carleton - Director @ 11:05 AM
3 comments
![]()
My posts will be mostly dealing acting and producing relating subjects. Just thought I should mention that.
posted by Rebecca - Producer @ 10:09 PM
0 comments
![]()
Just wanted to say a quick hello and give a brief introduction of myself. My name is Rebecca, and I'm the producer and a cast member of FLIP. I'm very excited about this project, and can't wait to regale you all with tales of the process. I'll tell ya'll more later. Have a wonderful weekend!
posted by Rebecca - Producer @ 10:05 PM
1 comments
![]()
[WARNING: Unless you are a film nerd, skip over this post. It will have absolutely no relevance whatsoever]
posted by Carleton - Director @ 9:58 PM
4 comments
![]()
I was lucky enough to get a whole bunch of extremely talented actors for this movie and I am very excited to be working with them all.
posted by Carleton - Director @ 9:29 PM
1 comments
![]()
You all waited patiently for a full hour, so I will now go into the basic outline of the movie. READY?! Here we go:
posted by Carleton - Director @ 9:06 PM
0 comments
![]()
 This is my tenative logo for the movie. I made it real quick in Photoshop.
posted by Carleton - Director @ 8:34 PM
0 comments
![]()
Ok, I know it's not OK to start a sentence with OK, but what the hey! So, this blog (or "web-log" as it once was called) is to keep up-to-date on the progress of a new short film entitled FLIP. The basic story will be layed out in a future post, what I can divulge right now is that it's 15 minutes long, takes place in Las Vegas, and will be shot with a DVX-100a video camera.
posted by Carleton - Director @ 8:09 PM
1 comments
![]()
This web-log will serve as an ongoing commentary on the trials and tribulations faced by a young filmmaker as he tries to complete a short film.
